Thứ Năm, 18 tháng 11, 2010

Decorate your pic with dreamy artistic effect

This tutorial uses some simple photoshop filters to make a really nice effect.


 Stock


1. After opening your photo, create a new selective color layer:
Reds: -100,-100,46,0
Greens:100,-100,-100,0
Cyans: 100,69,-33,24
Blues: -59,22,76,0
Magentas: -100,100,24,0


2. Merge all layers then duplicate it, choose Gassian blue with 3 px. Add layer mask to eraser blurred effect on the model.


3. Merge all layers and duplicate again. Choose Filter-Pixelate-Mosaic with cell size =20. Then choose Stylize-Glowing edges with Edge width=1, Edge brightness=20, smoothness=1. Change the mode to Linear Dodge 80%. Add layer mask to blur this effect on model and all around her.


4. Add a new layer, i use some star brush ( that you can download many kinds from Deviantart) to decorate the pic:
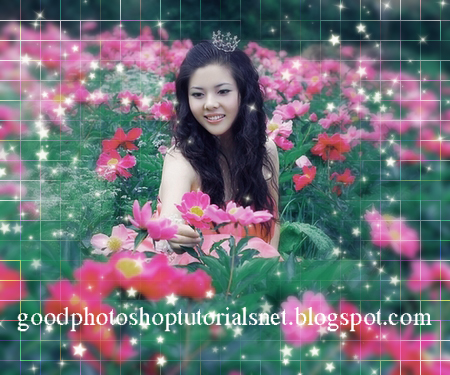
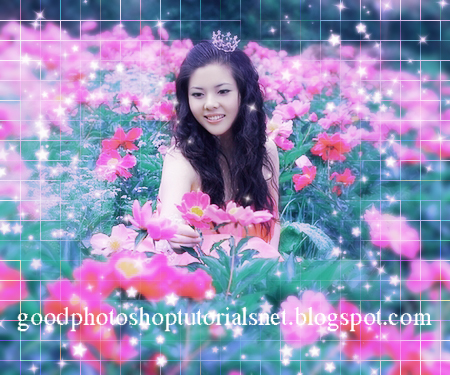
5. I use color e8b9fa to fill up and set it to Overlay 80%. Add layer mask to clear the model face.

Now the effect is done!
Vintage effect in 3 easy steps

You can create a vintage effect in 3 easy steps.


Stock


1. After opening your picture, create a new selective color layer:
Reds: -26,-18,-12,0
Yellows: 47,11,-30,0
Greens: 26,24,15,0
Cyans: 84,100,60,0
Blues: 45,71,31,0
Magentas: 78,56,58,0
Whites: 26,22,23,0
Neutrals: 8,6,-6,0
Blacks: 43, 29,31,-19


2. New Photo filter layer with Sepia color , Density 90%:


3. New selective color again:
Yellows: -22,-15, -100,0
Neutrals: 0,2,-7,0
Blacks: 2,9,0,0

Final result:

Thứ Sáu, 5 tháng 11, 2010

Great photo effect tutorial collection

I found some great photoshop tutorials here
Check out of them:
Utilise Custom Shapes and Texture to add Extra Flavour to Your Design in Photoshop


Create Beauty Woman Effect in Photoshop


Living Paints


Create a Flowery Natural Peace and Harmony Composition

Color a black and white model photo

Color a black and white model photo to make it look real :)


Stock


1. Duplicate your picture. I add a new layer and use soft brush, color fb91e6 to paint over the lips with mode is Color 100%.
Right click this layer, choose Inner glow:


2. Use soft brush on a new layer ( color mode 20%)  with color f9bcc6 painting over the skin:


3. Use soft brush with color 95d1f8 painting over the eyes. Set this layer to Soft light 100%.


4. New layer and i use soft brush, color 77f7c5 painting over eyelids. Se it to Soft light 100%. Choose add noise then adjust levels:


5. New layer, color 96c1f6 with soft brush painting over the right edge of the pic. Set this layer to Color 100%


6. New layer with Overlay mode:


Use Dodge and Burn tool for hair, eyes, lips. My result:


7. Use soft brush feb1dd for her cheeks on a new layer. Set it to Color burn 50%. 


8. New selective color layer:
Reds:-100,15,100,53
Cyans:0,50,-100,69
Magentas: -33,96,100,65
Whites:-35,12,100,-37
Neutrals: 6,6,-6,6
Blacks: 0,0,0,5

Now model looks really real!

Nice watercolor painting effect

Another simple way to make a nice watercolor painting effect.


Stock:


1. Duplicate your pic. Choose Filter-Artistic-Dry brush:


We have:


Duplicate the background, move it to the top, set to Soft light 60%:


2. Merge all layers. Choose Brush strokes-Angled strokes:


 We have final result:

Thứ Năm, 4 tháng 11, 2010

Colorful light backgrounds

Colorful light backgrounds ( AI file)


Download link :
Download

Romantic blue blending

Create a romantic blue scene with really easy tutorial


Stock:


- Duplicate your picture, then choose Channels on Layer Pallete. Hit Ctrl+A to select Green, Ctrl+C to copy it. Then paste it to Blue by pressing Ctrl+V. We have:


- Create a new selective color layer:
Reds: -45,0,-25,0
Cyans: 100, 100, -100, 0
Whites: 0, 0, -32,0
Neutrals: 10,0,0,0


- Ctrl+shift+Alt+E to merge all layers. Apply Lens Correction:


- New selective color again:
Cyans: 100,0.-100,0


- New layer and grab a circle around model
Then right click it, choose Make work path with 0.5 px

then choose brush settings:


right click this shape, choose stroke path with brush. Then set outer glow:


duplicate this layer, transform it:

Final effect: